Are you undertaking a home improvement project and want to install tiled flooring in your home? Well, tiles are a great way to spruce up an otherwise dull flooring! They are cost-effective options for homeowners on a budget and will enhance the aesthetic appeal of your space. However, the installation job matters, which is reason enough to engage professionals. This can be daunting for a beginner, but the guide below can help.
1. Have a checklist of all you need
Safety is a top consideration during the tile installation project, and you can achieve this by having proper tools. Have a checklist list of all you need, and acquire this early enough. Having the right equipment will ease the job and save time. Examples of tools you require include a tile rod saw, nipper, rubber mallet, glass hole cutter and more.
2. Set the right budget
A budget is a critical factor in your project. You need adequate funds to acquire the right materials and cater to the installation costs. Figure this out from the word go and set aside some cash for unexpected expenses. Find out the cost of tiles, and have the installation team guide you. Also, scrutinize different tile installation firms and hire one to suit your budget.
3. Choose the flooring materials
There are different types of tiles in the market; your options include;
- Ceramic tiles
- Porcelain tiles
- Glass tiles
- Marble tiles
- Vinyl tiles etc.
All come in varying designs and colors, and the maintenance needs differ. The Metro Tile team will advise that you discuss this with the tile installation team to help you choose the right tile for your needs. For instance, ceramic tiles are highly durable and require minimal maintenance. However, they are somewhat costly. On the other hand, Vinyl tiles are affordable but may not withstand heavy foot traffic like their ceramic counterparts.
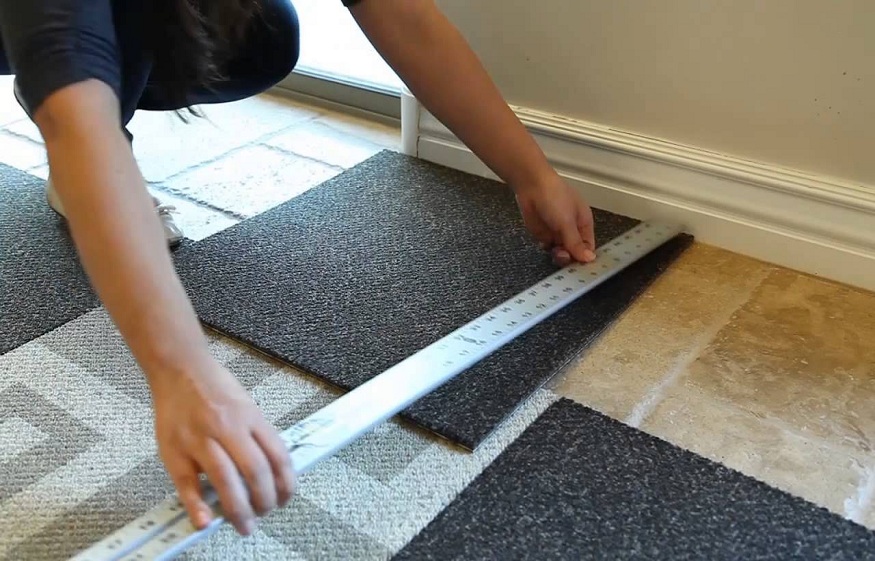
4. Get the right measurements/ Define where your cuts will be
Your space size determines the amount of tiles required, and you should get this right. Mark where you need to tile and double-check the measurements to avoid various errors. Simple mistakes may mean wasted tiles translating to additional costs.
As you map your floor, plan where the cuts will be. If you don’t do this, you will likely have slithered edges. Also, proper planning will ensure that your tiles fit well with minimal need for cutting the last tile.
5. Engage skilled tile installers
Steer off DIY tile installation projects as a beginner. Besides, you are bound to make blunders and may waste so many materials, time and money. All in all, entrust your project to a professional tile installation company. The team will handle different tile flooring types and guide you as required.
Wrapping up
A tile installation project involves multiple steps, and you want to stay organized from the start. First of all, acquire all you need and engage the right team. With professional tile installers, you can be sure of quality services and minimal wastage. Also, choose the right tile color and enjoy that stunning look in your space!